![[Previous image]](bw_prev.gif)
|
![[Return to Index]](bw_index.gif)
|
![[Next image]](bw_next.gif)
|
|
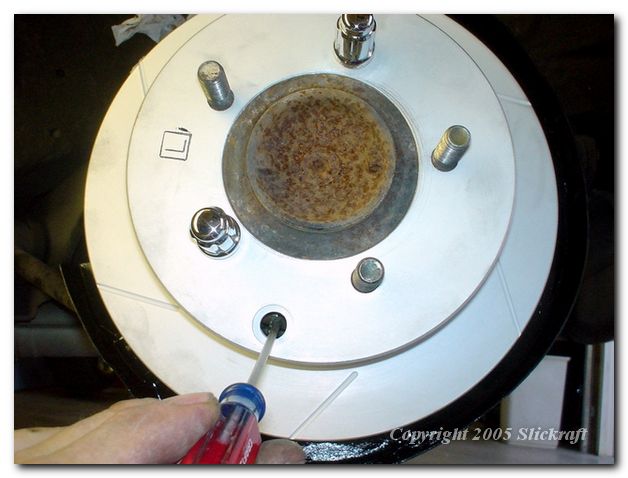
Both rotors should be on and spinning freely. Remove the rubber dust plug from the front face of the rotor and reach in with a small bladed screwdriver and ratched the adjustment wheel so the shoes will expand. Keep spinning the rotor and adjusting the wheel until a light drag is felt. Do this for the other side too until both drag slightly. Now pull the e-brake handle and release several times. This will help center the shoes inside the drum. Now go back and do the adjustment again. It may not need anymore adjustment but more than likely the shoes will have shifted a bit and there will be less drag felt on one or both sides. After you have both sides adjusted with a slight amount of drag on each rotor and the e-brake handle engages correctly (2-3 notches up) assemble the rest of the brake system. During a road test you will need to seat the e-brake shoes for best operation as well as the main disc pads. Follow the manufacturers recommendations for seating the new pads. For the e-brake shoes, in a safe area, lightly apply the e-brake while driving slowly maybe 15-20 mph for about 100 yards. Do this several times letting the shoes cool down each time. Now you can fine tune the adjustment nut on the e-brake handle if you like it to engage later or earlier. Just be sure you aren't driving around with the e-brakes on slightly. I have mine set at about 3 clicks to first engagement. Please note a common misconception. The e-brake shoes are NOT self-adjusting like standard rear drum brake shoes. They will probably never ever need adjusting again unless you drive around with them on accidently.
|
|